Preceding blogs on metrology have introduced some basic concepts which can serve as food for thought. Today, I would like to give you a couple of examples of the practical application of the concepts discussed so far in industrial cleaning applications.
Monitoring Contaminant Removal –
Everyone wants to know how long it takes for a cleaning process to totally clean a given part. This is important, of course, because a longer than required cleaning process wastes not only time but virtually all of the other resources involved in that process including chemistry, water and energy. In addition, if the required cleaning can be accomplished in a shorter time, the utilization of the cleaning equipment itself is increased. Assuming that all contaminants have weight, and that the cleaning process has been shown capable of removing the contaminant of concern from the part, a good indication of the progression of the cleaning process is given by measuring the weight of the part and the contaminant periodically during the process. When the weight stabilizes at a consistent value, it can be concluded that all of the contaminant has been removed and all that is left is the weight of the part itself. However, if the part weighs several pounds and the total weight of the contaminant is only a few grams, it is unlikely that the difference in weight between a part with contaminant vs. with the contaminant removed will be detected reliably by this scheme. The actual difference in weight likely won’t exceed the margin of error of a device capable of measuring several pounds. It is standard practice, therefore, to instead of measuring the weight of the part and the contaminant that we capture and measure the weight of the removed contaminant. Now the capacity of the scale need only be several grams and the sensitivity of the test will more likely accommodate our requirement to determine when no more contaminant is being removed from the part being cleaned. This example may seem elementary. In other cases, like the one shown below, the accurate way to quantify a parameter with maximum accuracy may be a little more complex.
Measuring Parts Per Million of Solids in Water –
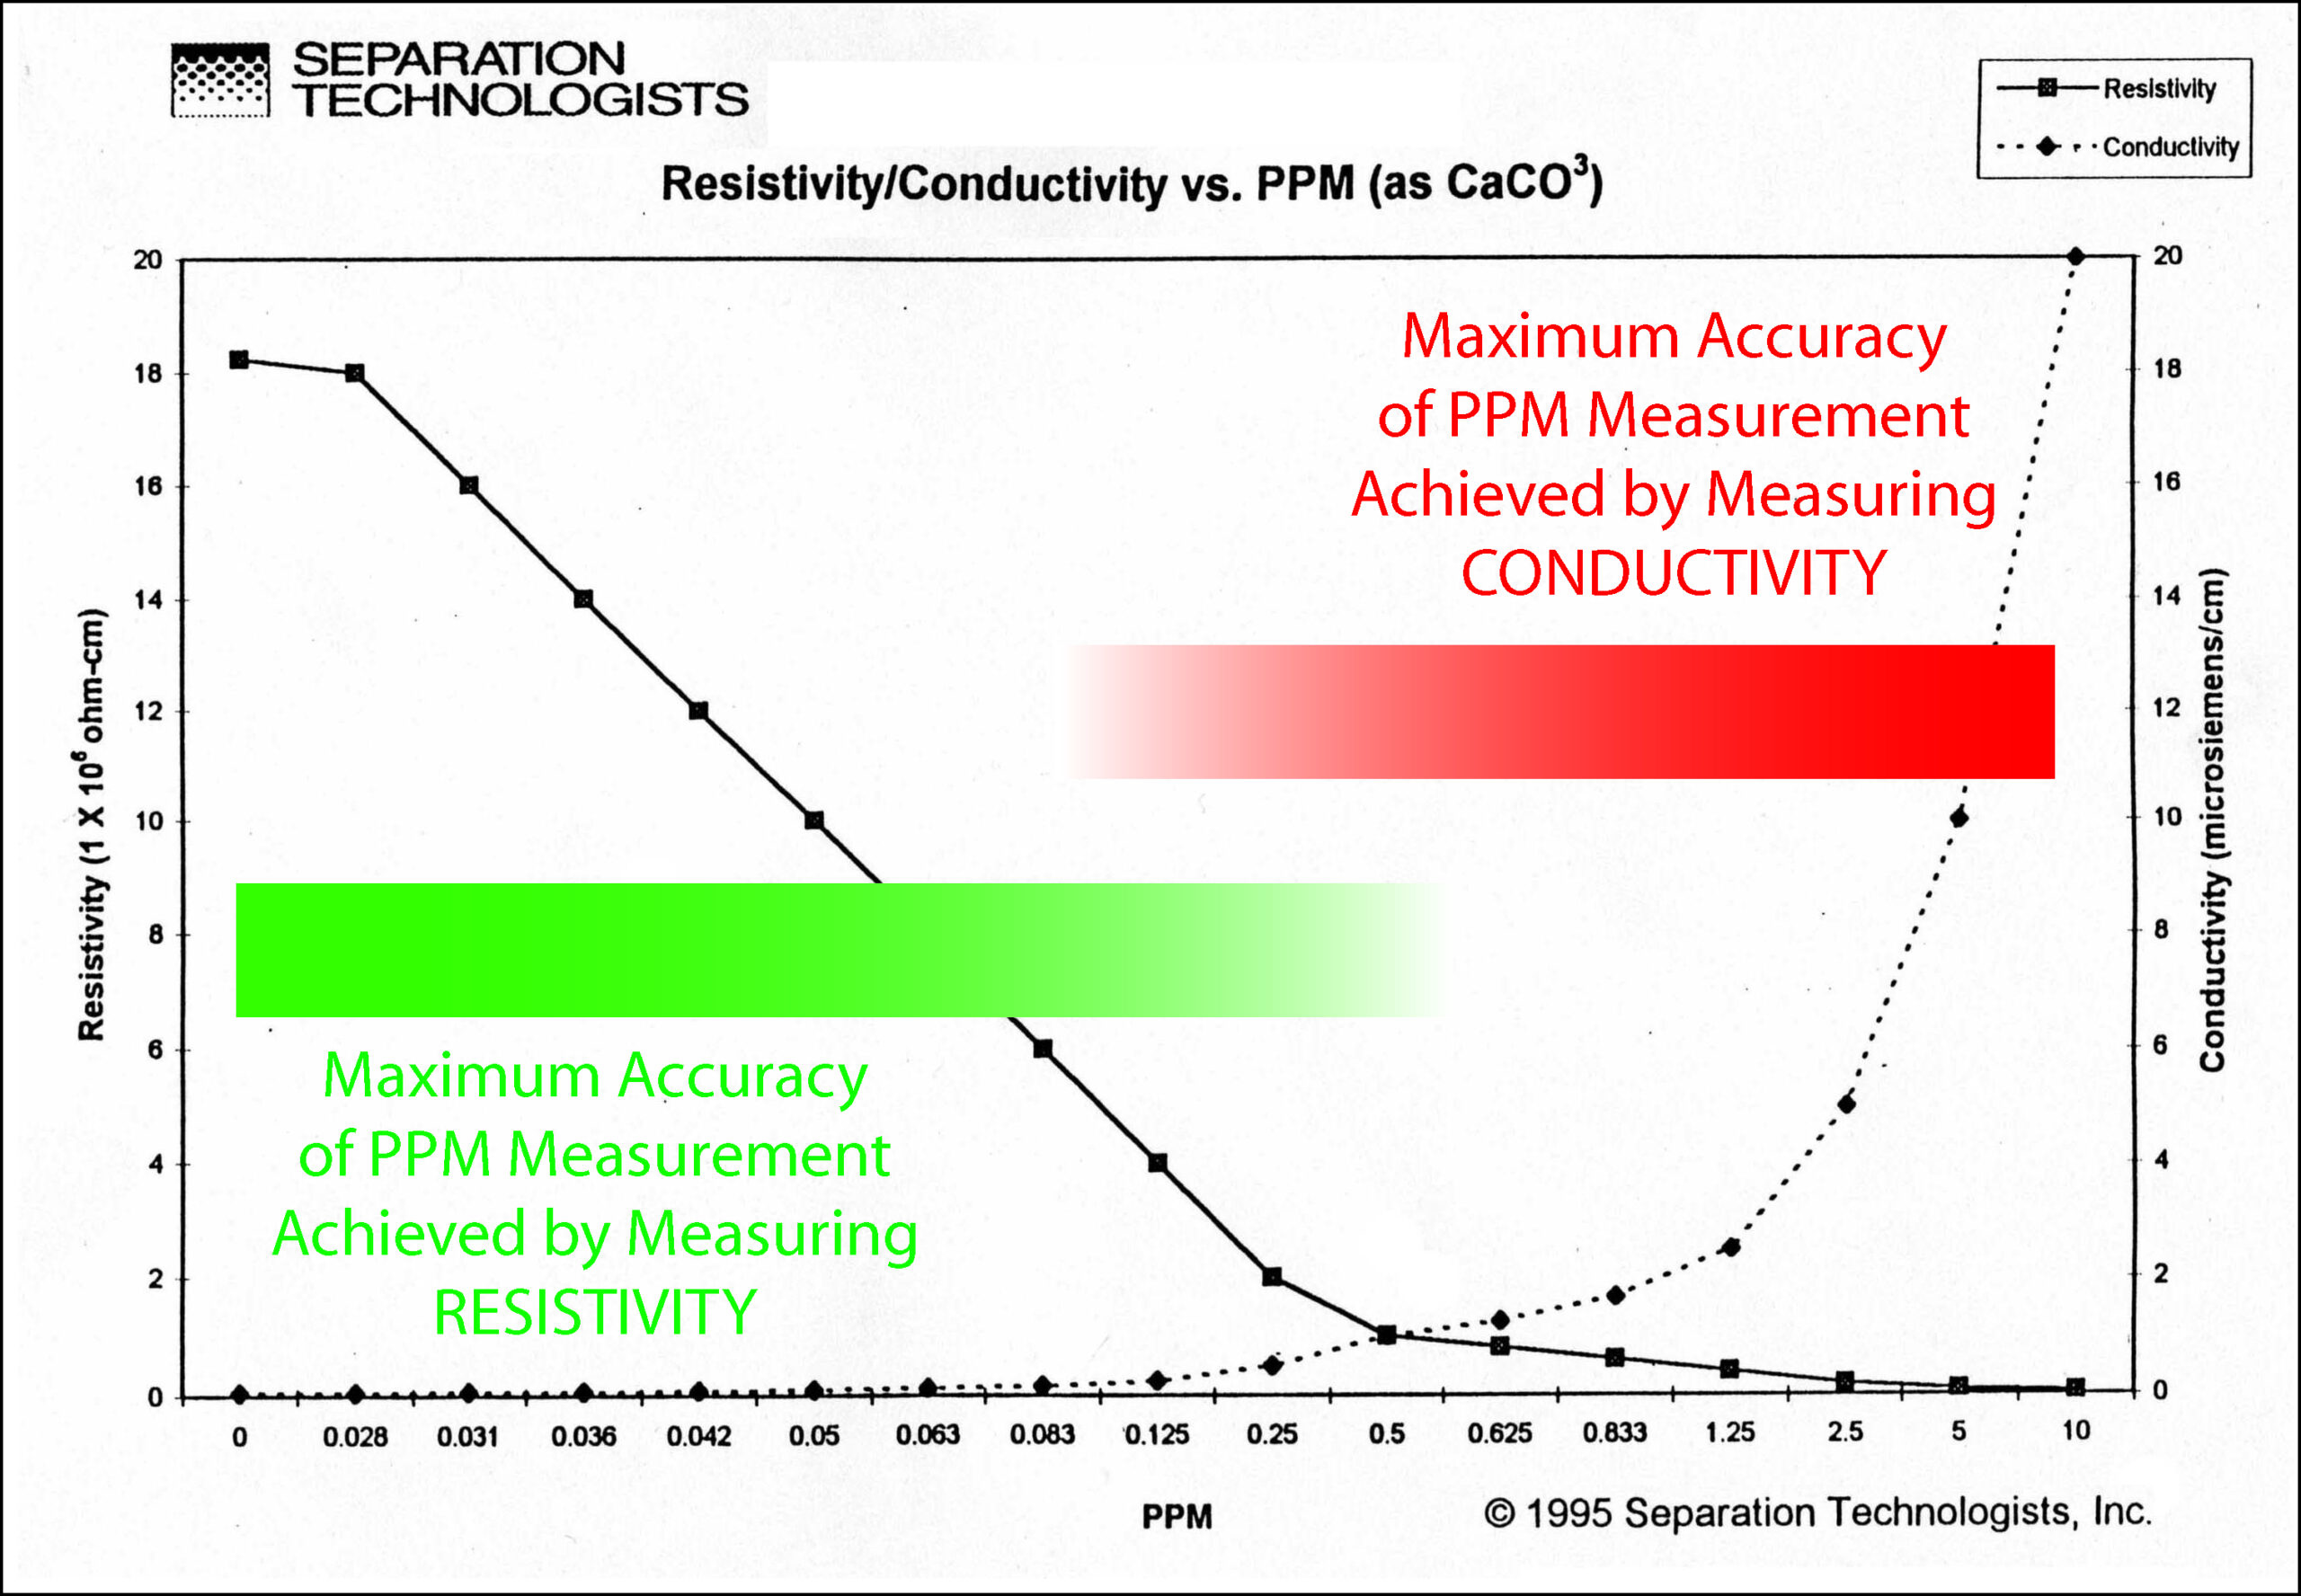
We often have a need to determine the parts per million (PPM) of solids in water. In some cases such as in cleaning baths the PPM readings will be very large. In determining the purity of rinse water, however, the PPM readings will be very small. Parts per million can be determined directly by evaporating the water and weighing the solid residue that remains compared to the starting quantity of water and solids. There are also instruments that can measure parts per million using either conductivity or resistivity. The following illustration shows a plot of both resistivity and conductivity for known solutions of calcium carbonate in water.

Resistivity and conductivity are reciprocals of each other. As a result, as conductivity increases, its reciprocal (1/conductivity) which is resistivity becomes smaller. For maximum sensitivity, it is best if any change in the parameter provides the biggest differential or “slope” in the corresponding measured result. The first thing to notice is that the PPM (X axis) is not linear. As concentration is increased the difference between units becomes smaller. A concentration of 0 PPM is at the extreme left end of the scale. A concentration of .1 PPM is approximately in the middle of the scale while a concentration of 10 PPM is at the extreme right end of the scale. The resistivity curve (squares) has the greatest slope between 0 and 1.0 PPM. After that, the slope flattens with the result that a relatively large change in PPM results in only a small change in resistivity as it approaches its ultimate value of zero. The slope of the conductivity curve (diamonds), on the other hand, increases from its minimum value of zero as the PPM increases. Although the non-linear scale of the X axis amplifies the difference, it can still be clearly seen that the sensitivity of measurement favors resistivity at low PPM concentration while the same is true of conductivity as the concentration approaches 10 PPM. The astute engineer will utilize the most sensitive measure depending on the PPM range of interest. In industrial cleaning systems, resistivity is commonly used to measure the quality of rinse water while conductivity is used to measure the concentration of chemistry in cleaning bath.
These are only two examples of how we make smart decisions when it comes to measuring things accurately with the available tools. When accuracy is important selecting the correct tool is an important consideration.
– FJF –

 Water – De-ionized – Hints
  A Fond Farewell to John Fuchs
  Millipore Testing – Evaluation by Particle Counting
  Tape Test for Cleaning Revisited